- Fortinet FortiManager-VM Install
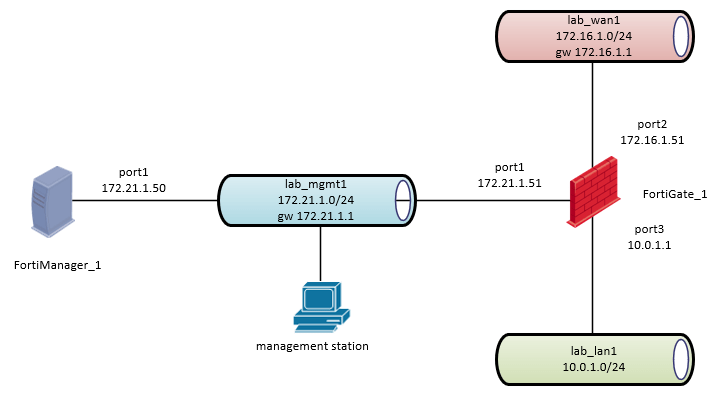
Network Diagram:
Steps:
1. Download the FortiGate for VMWare ESXi platform
Download the FortiGate-VM Virtual Appliance image for VMware ESXi from fortinet.com, and save it to your local computer:
Note:
A fortinet.com login is required.
2. Create VMware Virtual Machine
The FortiGate-VM is available in five virtual appliance models, which are determined by license, that provides different limitations such as throughput levels / virtual CPU / virtual network interfaces / virtual memory etc.
Minimal Hardware Requirements for FortiGate Virtual Appliance (FG-VM00): CPU: 1 Network Interfaces: 2 Memory: 1 GB RAM Storage: Thin Provision 32 GBFor the Testlab purposes will be used the minimal configuration. This configuration is not necessary to prepare in advance for the VM, because we will be deploying this virtual machine from ovf file which includes deployment template.
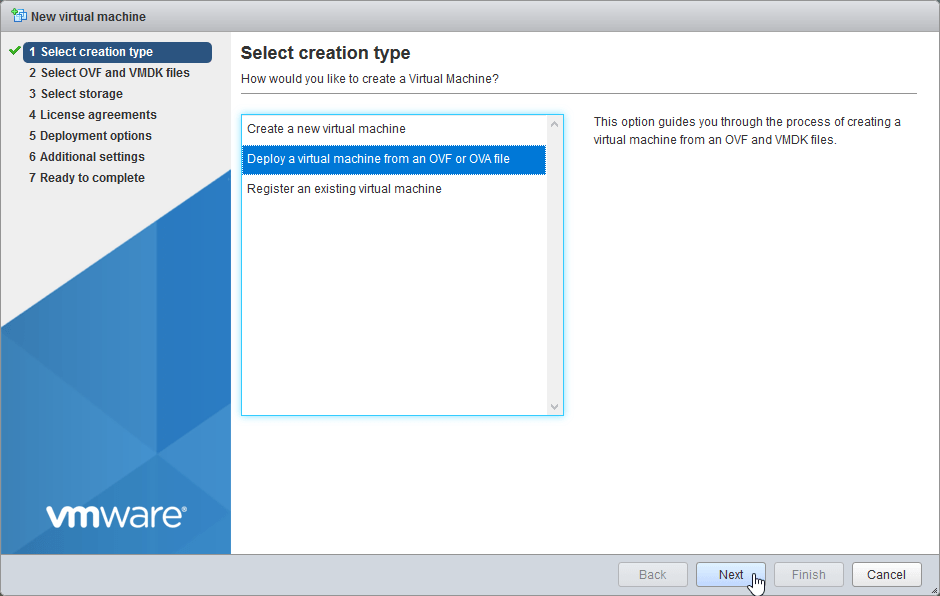
2.1 In VMware ESXi Web interface select “Create/Register VM”.

2.2 Select “Deploy a virtual machine from an OVF or OVA file”. Select Next.
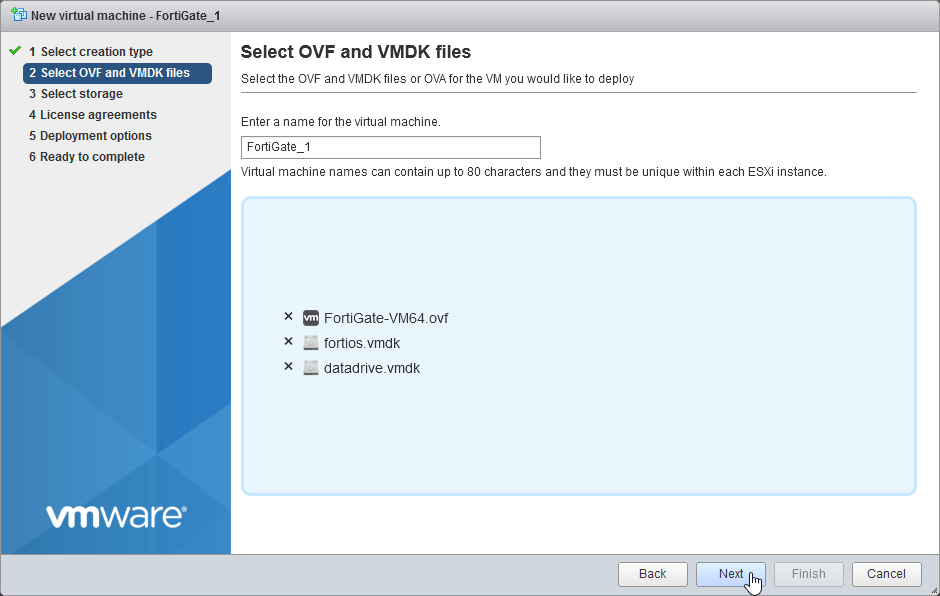
2.3 Enter name for the FortiGate-VM “FortiGate_1”, Select or drag and drop the fortios.vmdk , datadrive.vmdk file and FortiGate-VM64.ovf file. Select Next.
Note:
If you are deploying into older Version of ESXi, use appropriate .ovf file for deploy:
Template | Compatible with
FortiGate-VM64.ovf | ESXI 7.0(Hardware Version 17) or later
FortiGate-VM64.hw13.ovf | ESXI 6.5(Hardware Version 13) or later
FortiGate-VM64.hw15.ovf | ESXI 6.7U2+(Hardware Version 15) or later
FortiGate-VM64.vapp.ovf | ESXI 7.0(Hardware Version 17) or later
FortiGate-VM64.nsxt.ovf | ESXI 6.7U2+(Hardware Version 15) or later
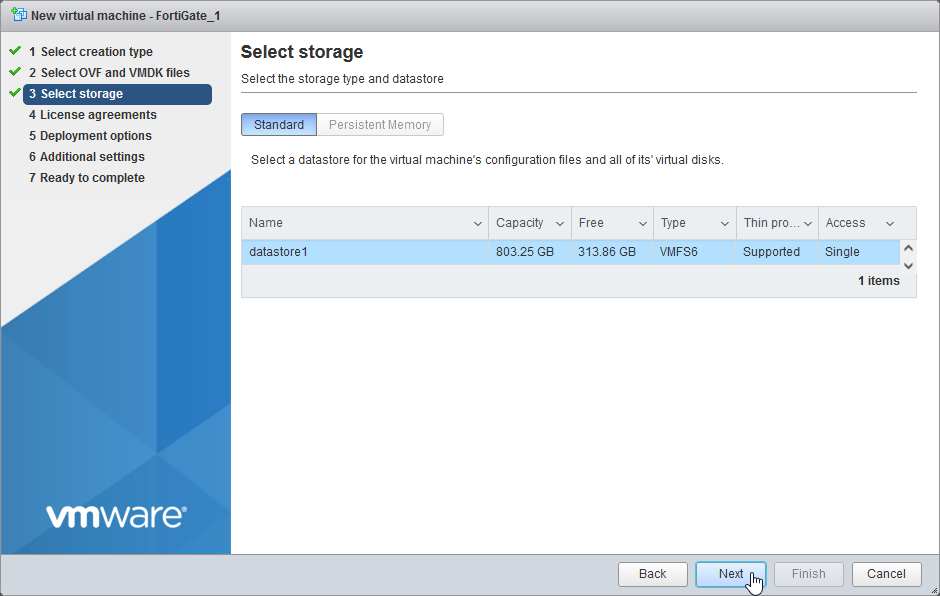
2.4 Choose your Datastore. Select Next.
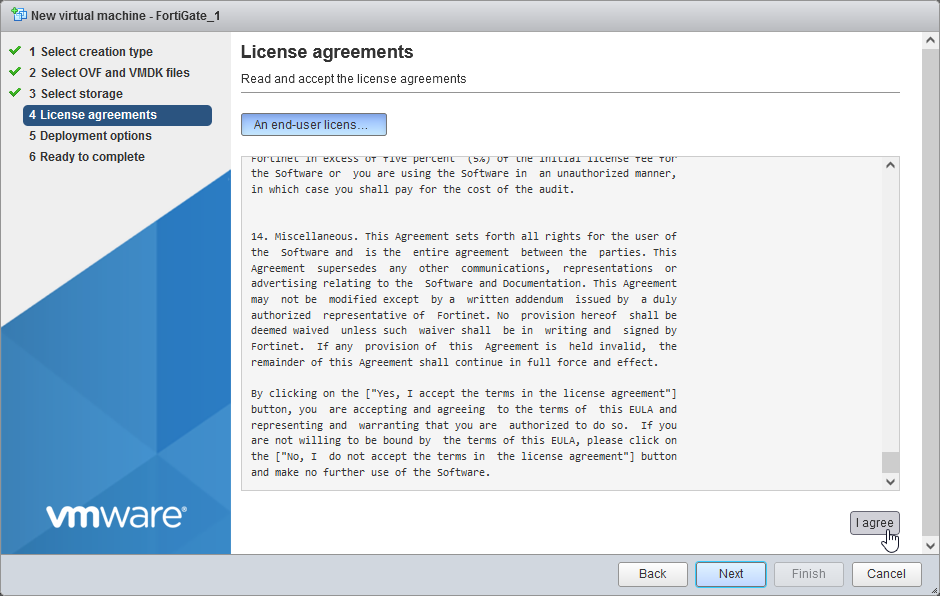
2.5 Accept license agreement. “I agree”, Select Next.
2.6 Configure your Network interface mappings and disk provisioning
“Network 1” – function Management (lab_mgmt1)
“Network 2” – function Outside Interface (lab_wan1)
“Network 3” – function Inside Interface (lab_lan1)
“Network 4-10” – no function – dummy network (vm_net1)
Disk Provisioning: Thin

2.7 Review your configuration before finishing the wizard. Select Finish.

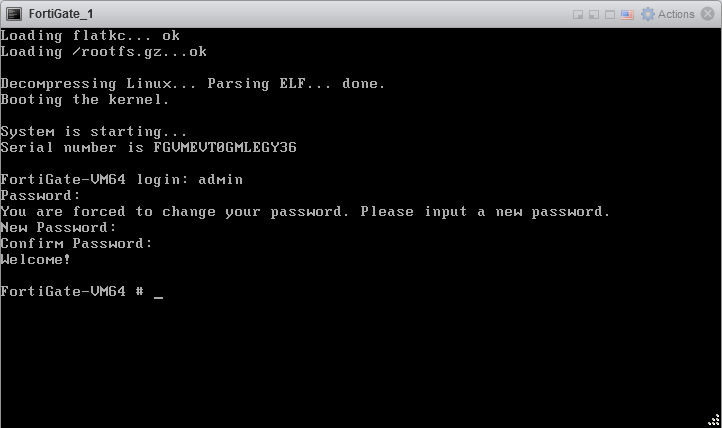
3. Complete the FortiGate setup using CLI
3.1 Open the VMware console and log in with default credentials: admin/no password, enter new admin password, press Enter.
3.2 Configure network
by default port1 is out of the box configured as management interface with enabled DHCP and allowed access for services: ping, https, ssh, http, fgfm.
FortiGate-VM64 # show system interface port1
config system interface
edit "port1"
set vdom "root"
set mode dhcp
set allowaccess ping https ssh http fgfm
set type physical
set snmp-index 1
next
end
configure management port1 ip 172.21.1.51/24
FortiGate-VM64 # config system interface
FortiGate-VM64 (interface) # edit port1
FortiGate-VM64 (port1) # set mode static
FortiGate-VM64 (port1) # set ip 172.21.1.51 255.255.255.0
FortiGate-VM64 (port1) # end
FortiGate-VM64 #
now it is possible to reach https GUI of the FortiGate on IP address 172.21.1.51 and to continue with configuration
I will finish the network configuration for port2, port3 and default gw (WAN) according to the network diagram in CLI
port2 (lab_wan1) 172.16.1.51/24
port3 (lab_lan1) 10.0.1.1/24
default gw: 172.16.1.1
FortiGate-VM64 (port1) # next
FortiGate-VM64 (interface) # edit port2
FortiGate-VM64 (port2) # set ip 172.16.1.51 255.255.255.0
FortiGate-VM64 (port2) # next
FortiGate-VM64 (interface) # edit port3
FortiGate-VM64 (port3) # set ip 10.0.1.1 255.255.255.0
FortiGate-VM64 (port3) # end
FortiGate-VM64 #
FortiGate-VM64 # config router static
FortiGate-VM64 (static) # edit 1
FortiGate-VM64 (1) # set gateway 172.16.1.1
FortiGate-VM64 (1) # set device "port2"
FortiGate-VM64 (1) # end
FortiGate-VM64 #
4. Basic FortiGate GUI configuration
4.1 Log in to FortiGate GUI with your account.

4.2 Select Begin and configure hostname


4.3 Select preferred Dashboard


5. Basic Policy configuration
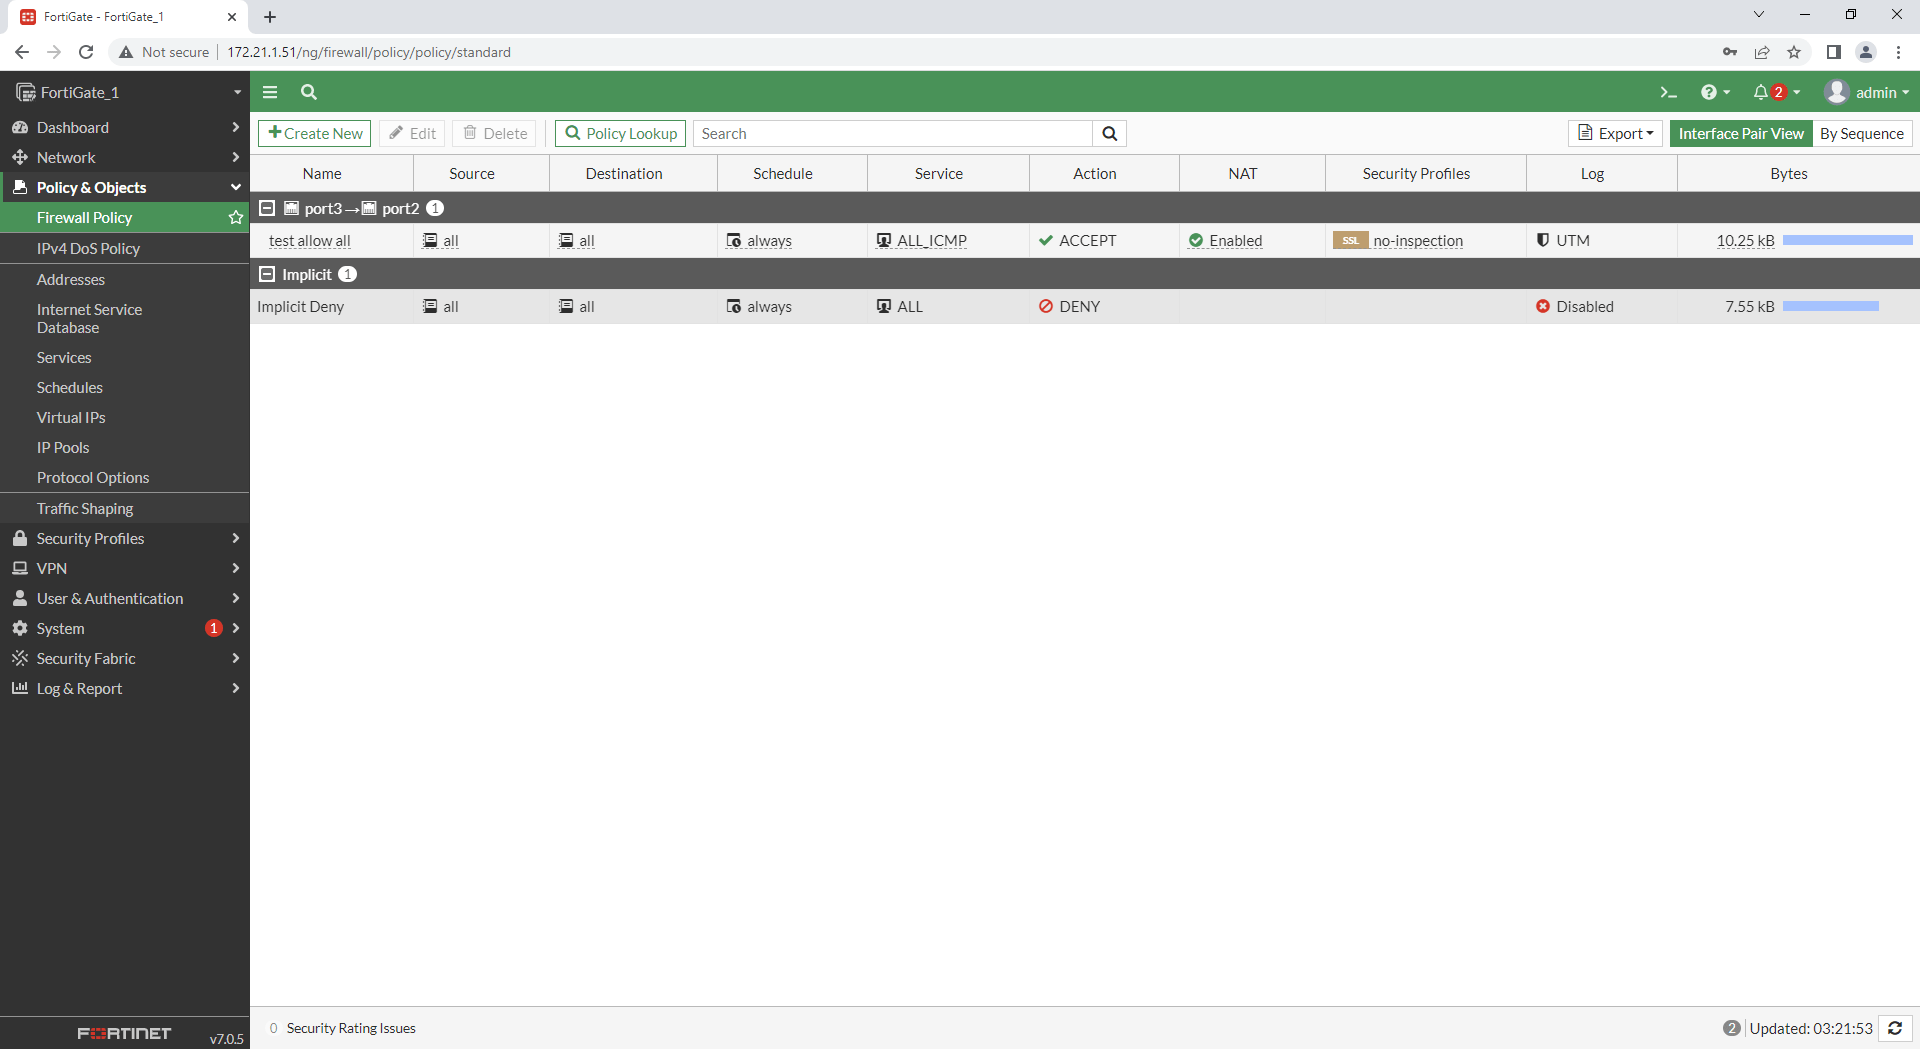
5.1 In GUI select Policy&Objects > Firewall Policy > Create New
configure Policy according to your needs. (In this example test rule with action “allow all icmp”)
Name: test allow all
Incoming interface: port3 (lan)
Outgoing interface: port2 (wan)
Source: all
Destination: all
Service: ALL_ICMP


At this point we have functional locally managed Fortinet FortiGate-VM Firewall with basic policy configuration already processing the traffic and ready for advanced configuration. FortiGate-VM comes out of the box with Plug&Play license for 15 days.
6. Remotely managed FortiGate with FortiManager
In this chapter will be FortiGate connected with existing FortiManager6.1 In FortiManager Select Device Manager and Add Device


6.2 Select Discover Device

6.3 Enter the IP address of the FortiGate System and Login credentials. Select Next

Note:
if you got the error message “Probe failed”:
1. verify if you have on the FortiGate under Network > Interfaces, FMG-Access enabled on the correct interface
2. adjust ssl encryption configuration on the FortiManager and try again Add Device

FortiManager_1 # config system global
(global)# set ssl-low-encryption enable
(global)# set fgfm-ssl-protocol sslv3
(global)# end
FortiManager_1 #
6.4 Add Device. Select Next and Finish


6.5 Configure simple Firewall Policy for FortiGate on the FortiManager
1. Installation Targets > Edit > Add FortiGate_1
2. Firewall Policy > Create New > allow icmp
3. Install Policy


At this point we have FortiGate Firewall connected with FortiManager and ready for advanced configuration.
Copyright © 2024 Martin Frlicka
Manage Cookie ConsentTo provide the best experiences, we use technologies like cookies to store and/or access device information. Consenting to these technologies will allow us to process data such as browsing behavior or unique IDs on this site. Not consenting or withdrawing consent, may adversely affect certain features and functions.
Functional Functional Always activeThe technical storage or access is strictly necessary for the legitimate purpose of enabling the use of a specific service explicitly requested by the subscriber or user, or for the sole purpose of carrying out the transmission of a communication over an electronic communications network.
Preferences PreferencesThe technical storage or access is necessary for the legitimate purpose of storing preferences that are not requested by the subscriber or user.
Statistics StatisticsThe technical storage or access that is used exclusively for statistical purposes. The technical storage or access that is used exclusively for anonymous statistical purposes. Without a subpoena, voluntary compliance on the part of your Internet Service Provider, or additional records from a third party, information stored or retrieved for this purpose alone cannot usually be used to identify you.
Marketing MarketingThe technical storage or access is required to create user profiles to send advertising, or to track the user on a website or across several websites for similar marketing purposes.